- {{ term.title || term.reference }}
In this tutorial, you'll see how to create a simple app from the ground up in Deployd. This tutorial assumes a working knowledge of jQuery. It doesn't assume any knowledge of Deployd, but it's recommended to read Your First API with Deployd if you haven't already.
Create a new app in the command line:
$ dpd create comments
$ cd comments
Using your text editor of choice, replace the default index.html file in the public folder:
<!DOCTYPE html>
<html>
<head>
    <title>Deployd Tutorial</title>
    <style type="text/css">
        body { font-size: 16pt; }
        .container { width: 960px; margin-left: auto; margin-right: auto; }
        form { border: #cccccc 1px solid; padding: 20px; margin-bottom: 10px; -moz-border-radius: 5px; -webkit-border-radius: 5px; border-radius: 5px; }
        .form-element { margin-bottom: 10px; }
        #refresh-btn { margin-bottom: 20px; }
        .comment { padding: 10px; margin-bottom: 10px; border-bottom: #cccccc 1px solid; }
        .comment .links { float: right; }
        .comment .links a { margin-left: 10px; }
        .comment .author { font-style: italic; }
    </style>
</head>
<body>
    <div class="container">
        <div id="comments">
        </div>
        <form id="comment-form">
            <div class="form-element">
                <label for="name">Name: </label>
                <input type="text" id="name" name="name" />
            </div>
            <div class="form-element">
                <textarea id="comment" name="comment" rows="5" cols="50">
                </textarea>
            </div>
            <div class="form-element">
                <button type="submit">Add New Comment</button>
            </div>
        </form>
    </div>

    <script src="http://code.jquery.com/jquery-latest.min.js"></script>
    <script type="text/javascript" src="script.js"></script>
</body>
</html>
Also add a file script.js and paste this code:
$(document).ready(function() {

    $('#comment-form').submit(function() {
        //Get the data from the form
        var name = $('#name').val();
        var comment = $('#comment').val();

        //Clear the form elements
        $('#name').val('');
        $('#comment').val('');

        addComment({
            name: name,
            comment: comment
        });

        return false;
    });

    function addComment(comment) {
        $('<div class="comment">')
            .append('<div class="author">Posted by: ' + comment.name + '</div>')
            .append('<p>' + comment.comment + '</p>')
            .appendTo('#comments');
    }

});
Run the app:
$ dpd --open
dpd>
The open command will automatically open http://localhost:2403 in your browser.
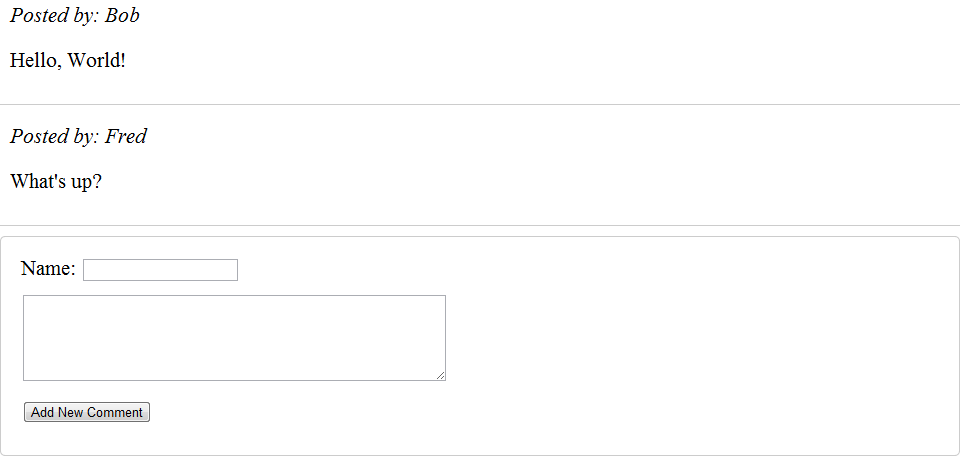
This basic app asks for a name and message body to post a comment. Take a moment to read the code and see how it works.
Next, we'll add a Deployd backend to this app, so that users can interact with each other and post comments.
Open the dashboard by typing dashboard into the dpd> prompt.
/comments.name and comment.That's all you have to do in the backend for now!
In index.html, add the following script reference in between jQuery and script.js (near line 37):
<script type="text/javascript" src="/dpd.js"></script>
This will add a reference to dpd.js, a simple library dynamically built specifically for your app's backend. Dpd.js will automatically detect what resources you have added to your app and add them to the dpd object. Each resource object has asynchronous functions to communicate with your Deployd app.
In script.js, add a loadComments() function inside of $(document).ready:
function loadComments() {
    dpd.comments.get(function(comments, error) { //Use dpd.js to access the API
        $('#comments').empty(); //Empty the list
        comments.forEach(function(comment) { //Loop through the result
            addComment(comment); //Add it to the DOM.
        });
    });
}
And call it when the page loads:
$(document).ready(function() {

    loadComments();

    //...

});
If you run the app now, you should see the comments that you created in the Dashboard.
The get() function that makes this work sends an HTTP GET request to /comments, and returns an array of objects in the resource. There's nothing magical happening in dpd.js; you can use standard AJAX or HTTP requests if you prefer, or if you're unable to use dpd.js. (e.g. for mobile apps)
Note: If you haven't used AJAX much, note that all dpd.js functions are asynchronous and don't directly return a value.
//Won't work:
var comments = dpd.comments.get();
This means that your JavaScript will continue to execute and respond to user input while data is loading, which will make your app feel much faster to your users.
Notice that any comments you add through the app's form are still gone when you refresh. Let's make the form save comments to the database.
Delete these lines from script.js (near line 10, depending on where you put your loadComments() function):
//Clear the form elements
$('#name').val('');
$('#comment').val('');

addComment({
    name: name,
    comment: comment
});
And replace them with:
dpd.comments.post({
        name: name,
        comment: comment
}, function(comment, error) {
        if (error) return showError(error);

        addComment(comment);
        $('#name').val('');
        $('#comment').val('');
});
Add a utility function at the very top of script.js to alert any errors we get:
function showError(error) {
        var message = "An error occurred";
        if (error.message) {
                message = error.message;
        } else if (error.errors) {
                var errors = error.errors;
                message = "";
                Object.keys(errors).forEach(function(k) {
                        message += k + ": " + errors[k] + "\n";
                });
        }

        alert(message);
}
An error object can include either a message property or an errors object containing validation errors.
If you load the page now, you should be able to submit a comment that appears even after you refresh.
In this tutorial, you saw how to create a simple app in Deployd. In the next part (coming soon), you'll see how to secure this app with Events.
The source code for this chapter includes a few extra features. If you're feeling adventurous, try adding them yourself:
put() and del() functions from dpd.js.Let us know if you have any ideas to improve our docs. Open an issue on github, send us an email, or tweet us.
This entire site, including documentation written in markdown is available on github. Pull requests are appreciated!